
If you’re craving a homemade spread that captures the bright, juicy flavor of fresh strawberries, this Strawberry Freezer Jam is your new go-to. It’s sweet, vibrant, and no canning required—just 30 minutes, a few pantry staples, and a freezer-safe container. This isn’t just easy—it’s foolproof. Compared to cooked jam, freezer jam keeps more of the fruit’s natural color and flavor, making it taste like summer in every bite. Whether you’re new to preserving or just short on time, this recipe is your shortcut to jam-making success.
Now let’s dive into what makes this recipe a favorite in my kitchen.
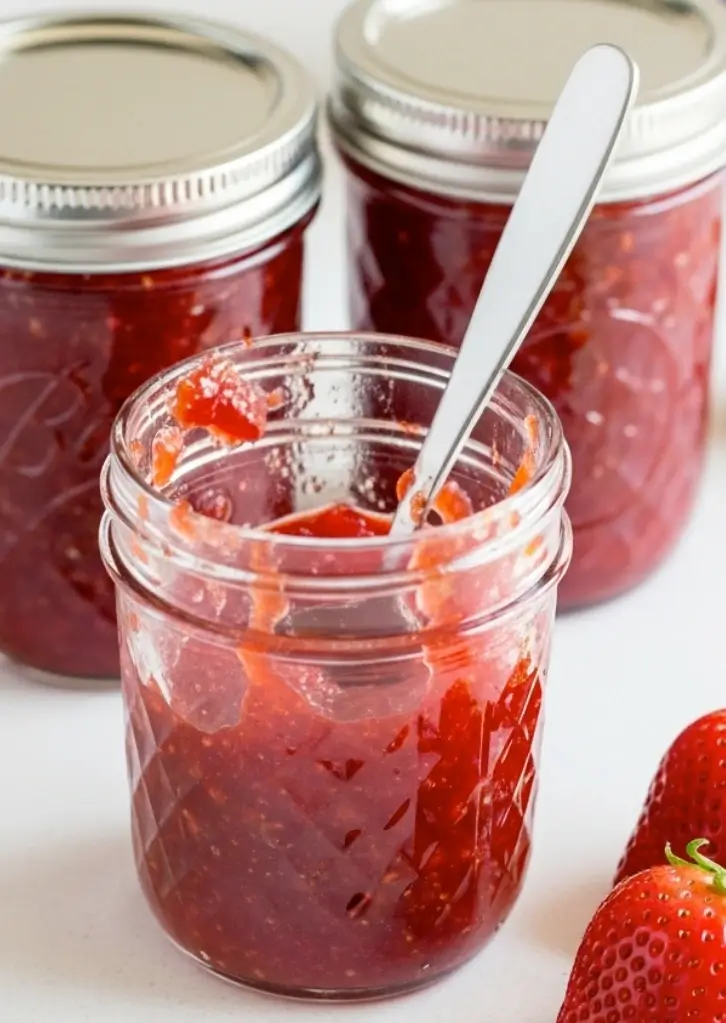
Table of Contents
Why This Strawberry Freezer Jam Is Always in My Fridge
A Childhood Classic With a Modern Twist
Growing up in suburban New York, strawberry season was a big deal. My mom and I would haul home cartons of fresh berries from the farmers’ market, and by the afternoon, the whole kitchen smelled like sun-warmed fruit and sugar. Back then, she’d spend hours simmering jam and sterilizing jars. But now, with freezer jam? I get the same sweet reward without the stress.
This Strawberry Freezer Jam keeps all that bright flavor and skips the boiling pots and canning tongs. It’s just as fresh as the Caprese Pasta Salad I keep on rotation in summer, and just as fuss-free as my weeknight Express Chickpea Curry.
What Makes Freezer Jam So Special?
Unlike regular jam, which is cooked and canned, freezer jam is made with raw fruit and thickened with pectin. This preserves the strawberries’ natural taste and brilliant red color. Strawberry Freezer Jam is especially loved for its simplicity and flavor—it tastes like freshly picked fruit in a jar. It’s:
- Quick: Done in under 30 minutes
- Versatile: Spread it on toast, swirl into yogurt, or spoon over ice cream
- Freezer-friendly: Stores for up to 1 year
- Beginner-proof: No canning tools or sterilization needed
Whether you’re pairing it with a cozy slice of sourdough or serving it alongside Air Fryer Veggie Chips as a sweet-and-savory snack board, this jam adds a pop of homemade joy to everything.
Strawberry Freezer Jam: Sweet, Simple & Ready in 30 Minutes
- Total Time: 25 minutes
- Yield: 6 half-pint jars 1x
- Diet: Vegetarian
Description
Sweet, vibrant, and so simple—this Strawberry Freezer Jam takes just 30 minutes and a handful of ingredients. No canning required, and it stays fresh in the freezer for up to a year. Perfect for beginners!
Ingredients
- 2 cups crushed strawberries (about 1 quart, stems removed and chopped)
- 4 cups granulated sugar
- 3/4 cup water
- 1 box Sure Jell Fruit Pectin
- Half-pint mason jars or freezer-safe containers
Instructions
- Wash and dry your containers. You’ll need enough for 5 to 6 half-pint servings.
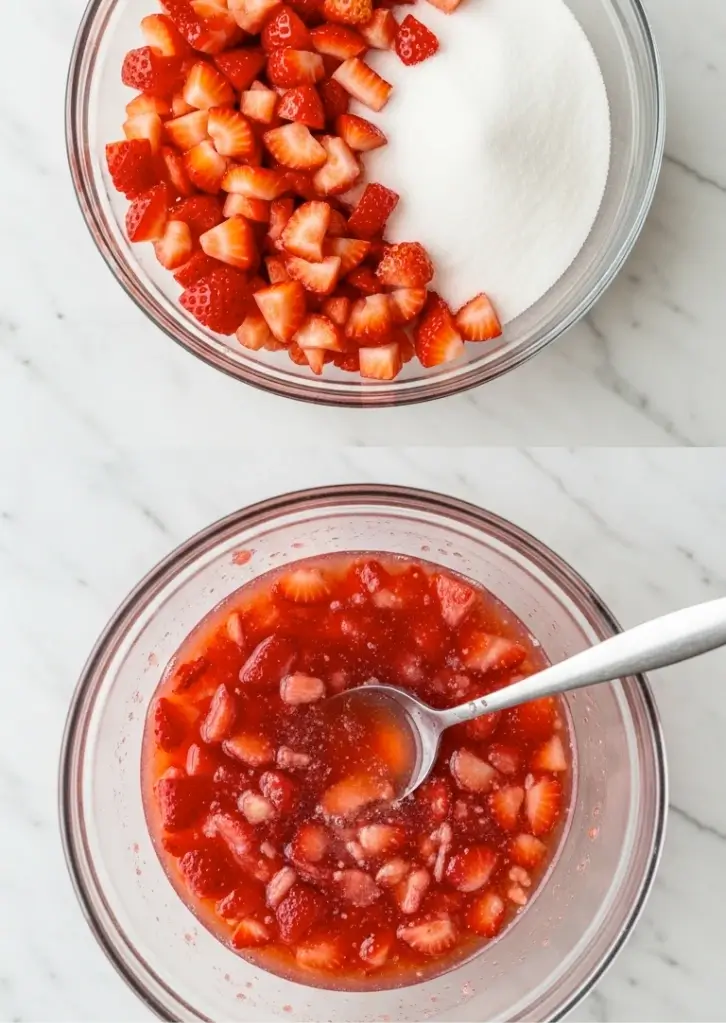
- Add strawberries to a food processor and pulse just a few times until well diced.
- Measure exactly 2 cups of strawberries into a large bowl.
- Add sugar one cup at a time, stirring well after each addition. Let stand 10 minutes.
- In a small saucepan, combine water and pectin. Bring to a boil over high heat, stirring constantly.
- Boil for 1 minute, then remove from heat.
- Add pectin mixture to the strawberries and stir thoroughly for several minutes until sugar is fully dissolved.
- Ladle jam into containers, leaving 1/2 inch of headspace.
- Seal containers with lids and let sit at room temperature for 24 hours.
- Refrigerate for up to 4 weeks or freeze for up to 1 year.
Notes
Try the “No Sugar Needed” pectin if you’d like to make a low-sugar version.
If your jam doesn’t set properly, dissolve another package of pectin and stir it in.
- Prep Time: 5 minutes
- Cook Time: 20 minutes
- Category: Side Dish
- Method: No-Cook
- Cuisine: American
Nutrition
- Serving Size: 1 jar
- Calories: 558
- Sugar: 135g
- Sodium: 20mg
- Fat: 0g
- Saturated Fat: 0g
- Unsaturated Fat: 0g
- Trans Fat: 0g
- Carbohydrates: 144g
- Fiber: 1g
- Protein: 0g
- Cholesterol: 0mg
How to Make Strawberry Freezer Jam in 30 Minutes
Ingredients You’ll Need
Making this Strawberry Freezer Jam is as easy as it gets. You only need 5 basic ingredients—and no special equipment beyond some jars and a food processor. Here’s what to gather:
- 2 cups crushed strawberries (about 1 quart of ripe strawberries, stems removed and chopped)
- 4 cups granulated sugar
- 3/4 cup water
- 1 box fruit pectin (like Sure-Jell, see variations below)
- Half-pint containers or jars (plastic or glass mason jars)
Pro Tip: Measure the strawberries and sugar exactly. The ratio is key to helping your jam set correctly.
If you’re new to preserving produce, this method is even easier than Canning Jalapeños, and way less intimidating than stove-top jam making.
Step-by-Step Instructions
Step 1: Prepare your jars
Wash and dry your containers thoroughly. You’ll need enough jars for 5 to 6 half-pint servings of Strawberry Freezer Jam.
Step 2: Process the berries
In a food processor or blender, pulse the strawberries 3–4 times. You want small, visible pieces—don’t puree. Measure exactly 2 cups into a mixing bowl.
Step 3: Add the sugar
Stir the sugar into the crushed strawberries one cup at a time. Mix thoroughly, then let the mixture rest for 10 minutes, stirring occasionally to help the sugar dissolve.
Step 4: Cook the pectin
In a small saucepan, combine the water and powdered pectin. Bring to a rolling boil over high heat, stirring constantly. Boil for 1 full minute, then remove from heat.
Step 5: Mix pectin into fruit
Pour the hot pectin into the strawberry-sugar mixture. Stir well—for at least 3 minutes—until all sugar is dissolved and no longer gritty.
Step 6: Fill the jars
Ladle the jam into your clean jars, leaving 1/2 inch of headspace at the top. Seal with lids.
Step 7: Let it set
Let the jars sit at room temperature for 24 hours. Then refrigerate for up to 4 weeks, or freeze for up to 1 year. Once chilled, your Strawberry Freezer Jam is ready to enjoy.
For a recipe just as fast and flexible, check out my Instant Pot Corned Beef—another game-changer in my easy meal rotation.
How to Serve and Customize Strawberry Freezer Jam
Sweet and Savory Ways to Use It
One of the best things about Strawberry Freezer Jam is how versatile it is. Because it’s not cooked, the flavor stays bright and fresh—perfect for everything from breakfast to dessert. Whether you’re hosting brunch or just snacking with your kids, this jam adds a homemade touch.
Here are some favorite ways to use it:
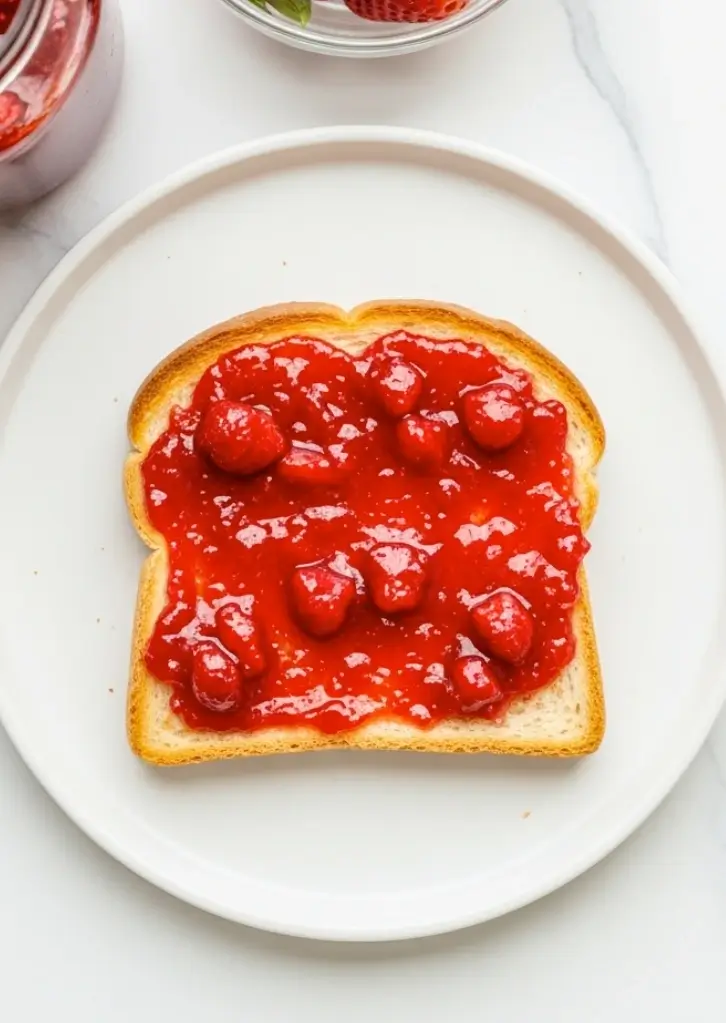
- Spread generously on toast, croissants, or fluffy buttermilk biscuits
- Layer into parfaits with yogurt and granola
- Spoon over cheesecake or swirl into vanilla ice cream
- Make a next-level PB&J
- Pair with cheeses and crackers on a board alongside Roasted Veggie Bowls
- Use as a sweet glaze for Lemon Herb Air Fryer Salmon
This Strawberry Freezer Jam is one of those fridge staples that you’ll reach for more than you think—especially during berry season.
Creative Variations to Make It Your Own
Once you’ve mastered this easy jam recipe, try switching things up with these flavor twists. Each one keeps the base technique the same while adding a fresh spin to your jam routine:
1. Low-Sugar Strawberry Freezer Jam
Use a “no sugar needed” pectin and reduce sugar to 2 cups. This creates a softer-set jam with a deeper berry flavor—great for spreading or spooning.
2. Triple Berry Freezer Jam
Replace half the strawberries with blueberries, blackberries, or raspberries for a mixed berry blend that’s vibrant and full of antioxidants.
3. Vanilla Strawberry Freezer Jam
Add ½ teaspoon of pure vanilla extract after stirring in the pectin. The vanilla adds warmth and works beautifully in desserts or layered with whipped cream.
4. Strawberry Lemon Freezer Jam
Mix in 1 tablespoon of lemon juice and some zest for brightness. It also adds natural acidity to help preserve color and taste.
5. Strawberry Jalapeño Freezer Jam
Add one finely chopped jalapeño (seeds removed) for a gourmet-style, sweet-heat combo—ideal for charcuterie boards.
Each variation is freezer-safe and just as easy as the original. If you love flexibility in your recipes, this is just as adaptable as our Air Fryer Veggie Chips—snackable, simple, and family-friendly.
Storage Tips for Long-Lasting Freshness
Once your Strawberry Freezer Jam has set for 24 hours at room temperature, it’s ready to be refrigerated or frozen. Here’s how to keep it tasting fresh for months:
- In the fridge: Lasts up to 4 weeks. Keep tightly sealed in clean containers.
- In the freezer: Lasts up to 12 months. Thaw in the refrigerator overnight before using.
- After opening (from freezer): Use within 3–4 weeks for best quality.
Be sure to leave about 1/2 inch of headspace at the top of each jar to allow the jam to expand during freezing. Whether you store it in plastic freezer containers or half-pint mason jars, this jam holds up beautifully.
If you’re into meal prep, pairing this jam with breakfast recipes from our blog section will help you create homemade convenience without compromise.
Frequently Asked Questions
Can you freeze strawberries then make jam?
Yes! Frozen strawberries work well as long as they’re fully thawed before you start. Drain off excess liquid and proceed with the recipe. It’s a great way to use up berries before they go bad or to make jam off-season.
What is the difference between freezer jam and regular jam?
The main difference is cooking. Strawberry Freezer Jam is made with raw fruit and stored in the freezer instead of being cooked and canned. This keeps the flavor fresher and the texture looser. It’s also much quicker—no need for boiling or water baths.
What is the best thickener for freezer jam?
Fruit pectin is the standard choice. Brands like Sure-Jell or Ball Classic work great. If you prefer a no-cook, low-sugar version, look for “no sugar needed” pectin. Some natural methods, like chia seeds, can also thicken jam, but the texture and shelf life may vary.
Does strawberry freezer jam need lemon juice?
Not always. Most pectin products contain the acidity needed to help jam set, but lemon juice can improve brightness and flavor. It’s especially useful if you reduce the sugar or skip commercial pectin.
The Easiest Homemade Jam You’ll Ever Make
This Strawberry Freezer Jam recipe is proof that homemade doesn’t have to mean hard. It’s sweet, vibrant, and captures summer in a jar—ready in under 30 minutes. Whether you’re spooning it over toast or stirring it into yogurt, it adds a pop of sunshine to everyday meals.
And the best part? No canning required.
From my Brooklyn kitchen to yours—happy jamming! If you try it, be sure to leave a review or share your twist. I’d love to see how you make it your own.
Love Easy, Flavor-Packed Recipes
If you’re enjoying this recipe and want more quick, delicious meals like it, follow us on Facebook and Pinterest for new posts, cooking tips, and behind-the-scenes peeks from my Brooklyn kitchen. We share weekly ideas to make your time in the kitchen easier—and more fun.