
If you’ve ever had more jalapeños than you know what to do with, I’ve been there. I’m Sarah—home cook, former teacher, and founder of Easy Peasy Recipes—and this easy method for canning jalapeños at home came out of one of those too-many-peppers moments in my Brooklyn kitchen.
Unlike traditional pressure canning, this recipe is all about simplicity. No fancy equipment. No long processing. Just a quick homemade brine, fresh jalapeños, and a little patience while the flavors soak in. In under an hour, you’ve got pickled jalapeños ready to spice up anything from pizza to chili (I especially love them with express chickpea curry).
Whether you’re a first-time canner or just looking for a fast way to preserve jalapeños with a satisfying crunch, this guide has everything you need. Let’s turn those fiery green beauties into a fridge staple you’ll use all week long.
Table of Contents
Why I Love This Recipe
It’s Fast, Foolproof, and Full of Flavor
When I first tried canning jalapeños, I assumed it meant pressure cookers, sterilizing jars, and spending hours in the kitchen. I was wrong. All I needed was a saucepan, a few pantry basics, and the confidence to give it a shot. This method skips the stress and still delivers bold, briny, crunchy jalapeños in less than an hour. It’s one of those recipes that proves simple really can be spectacular.
I love the way vinegar and sugar enhance the jalapeños’ natural heat without overwhelming it. The result? That bright, zesty bite that makes everything—from tacos to grilled cheese—way more exciting. It’s the kind of flavor that turns your leftovers into something you actually want to eat.
It Helps Me Waste Less and Use More
Another reason I keep coming back to this method is how practical it is. Whether I’m working through a big market haul or saving a garden overflow, canning jalapeños is my favorite way to use what I’ve got before it goes bad. There’s something incredibly satisfying about turning fresh produce into a fridge-ready jar of homemade goodness.
Plus, this recipe is a total win for beginners. You don’t need special tools or experience—just a few steps and a bit of patience. It’s become a regular in my kitchen, right alongside my go-tos like lemon herb air fryer salmon and crispy air fryer veggie chips. Quick, reliable, and always worth it—that’s why I keep canning jalapeños, batch after batch.
Canning Jalapeños: My Easy Pickled Version Anyone Can Make at Home
- Total Time: 42 minutes
- Yield: 2 cups 1x
- Diet: Vegan
Description
This quick-pickled jalapeño recipe is an easy way to preserve fresh peppers with bold, tangy flavor. No pressure canner needed—just a simple brine and 40 minutes from start to finish.
Ingredients
- 1 lb fresh jalapeños, sliced into rings
- 2 cloves garlic, peeled
- 1.5 cups white vinegar
- 1/2 cup water
- 1 Tbsp salt
- 1 Tbsp sugar
Instructions
- Wash and slice jalapeños; peel garlic cloves.
- Add vinegar, water, salt, and sugar to a saucepan. Bring to a boil, stirring to dissolve.
- Remove from heat. Add jalapeños and garlic to the hot brine, cover, and let sit for 30 minutes.
- Transfer to a clean, airtight jar and refrigerate.
- Let chill for 24 hours before using for best flavor.
- Use within 2 months, keeping refrigerated.
Notes
For extra heat, keep the seeds in.
To customize, add a pinch of smoked paprika or switch white vinegar with apple cider vinegar.
- Prep Time: 10 minutes
- Cook Time: 2 minutes
- Category: Condiments
- Method: Pickling
- Cuisine: American
Nutrition
- Serving Size: 1/4 cup
- Calories: 32
- Sugar: 1g
- Sodium: 876mg
- Fat: 0.2g
- Saturated Fat: 0g
- Unsaturated Fat: 0.1g
- Trans Fat: 0g
- Carbohydrates: 5g
- Fiber: 2g
- Protein: 1g
- Cholesterol: 0mg
How to Make Pickled Jalapeños (Step-by-Step)
Ingredients You’ll Need
This quick recipe for canning jalapeños at home couldn’t be easier. You only need a handful of pantry staples to get started:
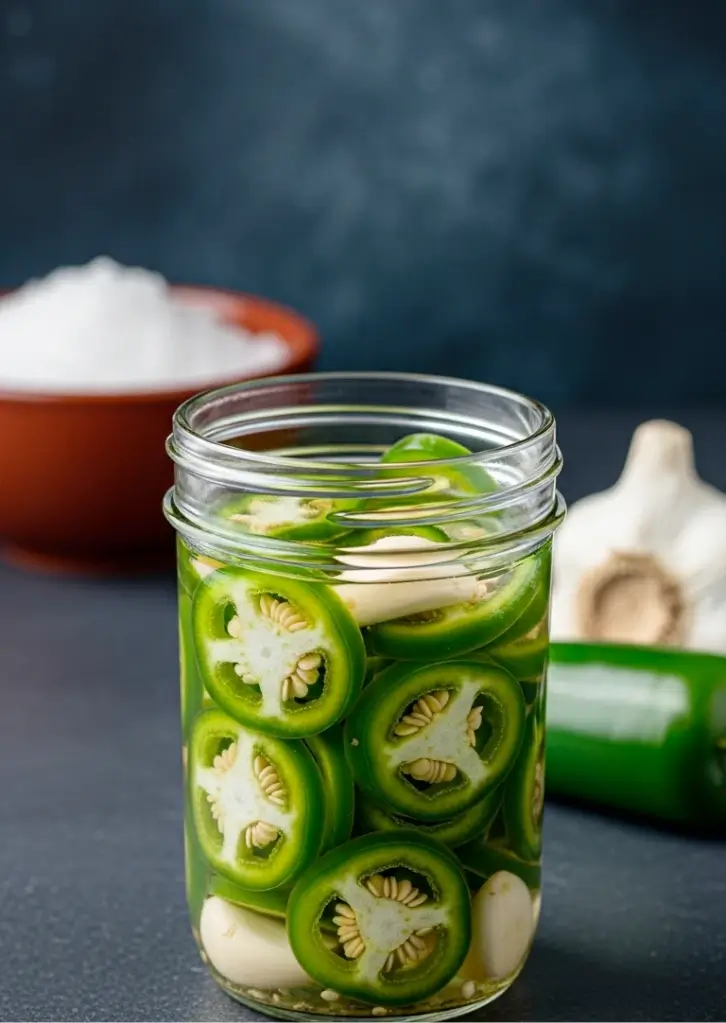
- 1 lb. fresh jalapeños – sliced into rings
- 2 cloves garlic – peeled and left whole
- 1.5 cups white vinegar – gives that classic pickled zing
- 1/2 cup water – balances the acidity
- 1 Tbsp salt – for flavor and preservation
- 1 Tbsp sugar – adds just enough sweetness to soften the heat
That’s it! If you’ve made my creamy mushroom and spinach pasta, you’ve probably got most of these already in your kitchen.
Step-by-Step Instructions
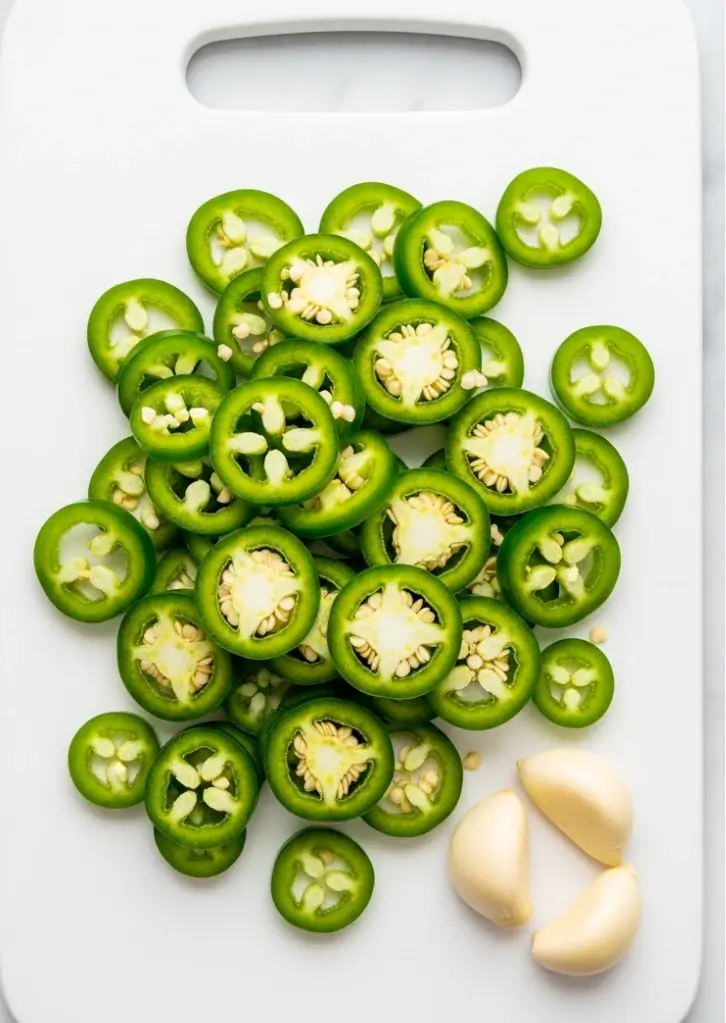
- Prep the peppers. Wash your jalapeños and slice them into rings. You can leave the seeds in for extra heat. Peel the garlic cloves and set them aside.
- Make the brine. In a medium saucepot, combine the vinegar, water, salt, and sugar. Bring the mixture to a boil over medium-high heat, stirring to make sure everything dissolves.
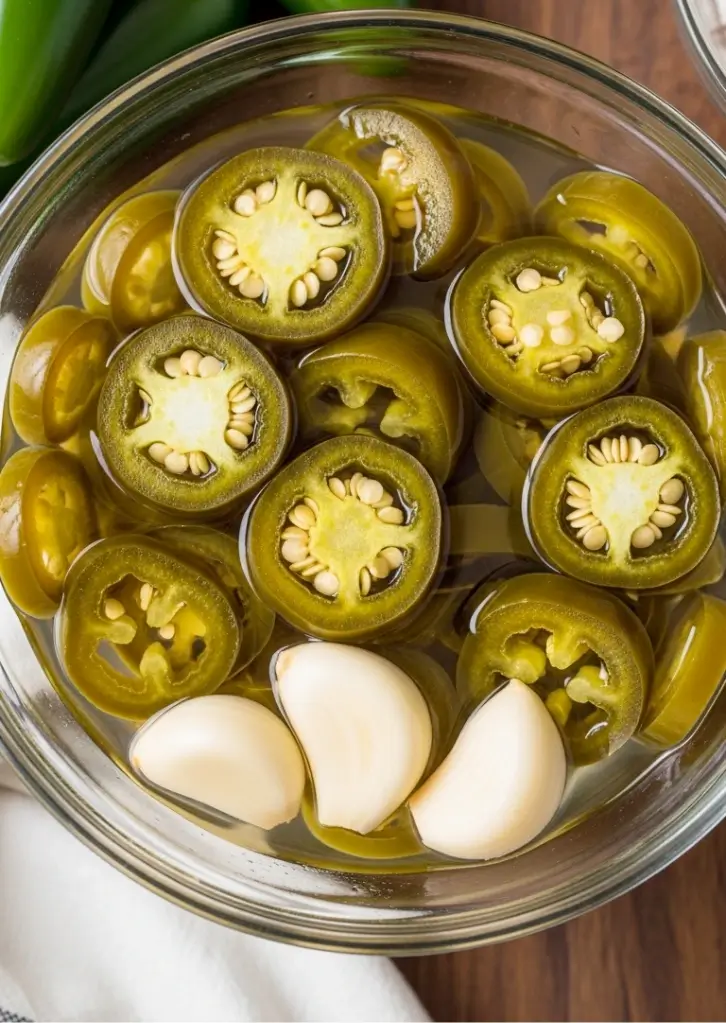
- Add the jalapeños and garlic. Once the brine hits a boil, turn off the heat. Add the jalapeños and garlic to the pot, cover with a lid, and let them sit for 30 minutes. Stir occasionally so all the slices soak up the flavor.
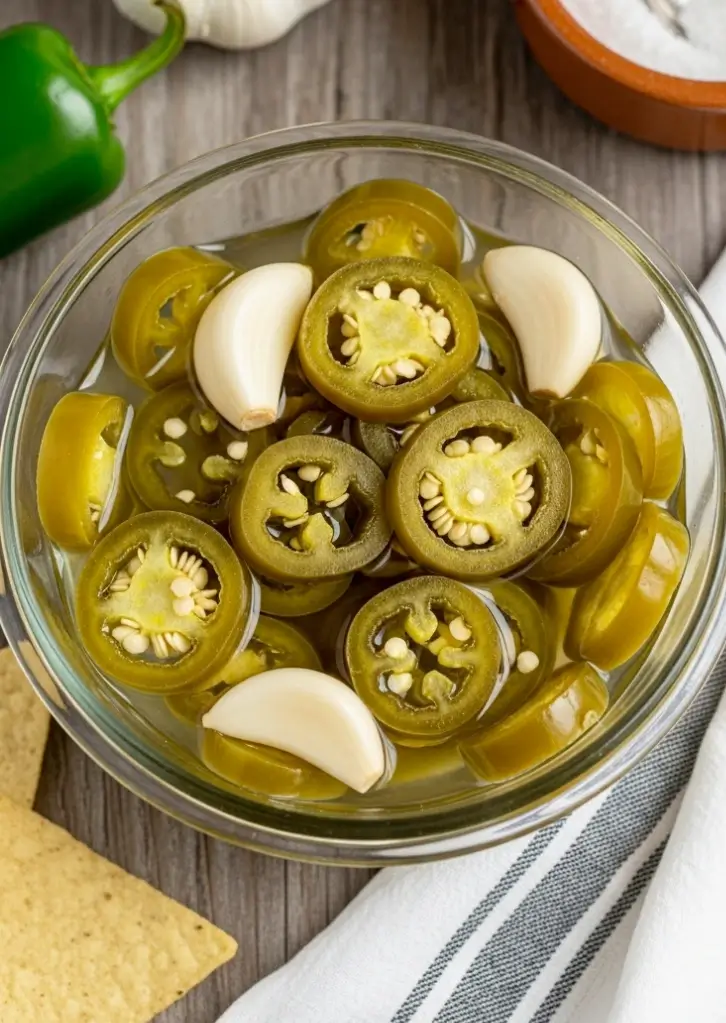
- Store. Once they’ve cooled and turned from bright green to olive green, transfer the jalapeños and brine into a clean glass jar or airtight plastic container. I reuse glass jars from sauces like my honey garlic chicken all the time.
This batch will keep for up to two months in the fridge, and the flavor only gets better with time.
How to Serve Pickled Jalapeños
Easy Ways to Use Pickled Jalapeños Every Day
Once you’ve made a batch from this simple canning jalapeños method, the possibilities are endless. These tangy slices bring just the right amount of heat to so many everyday dishes. I love piling them onto nachos, tucking them into breakfast burritos, or layering them into grilled cheese sandwiches for a spicy upgrade. They also add a bold punch when mixed into egg salad or tossed with air fryer veggie chips for a quick snack with serious flavor.
On busy nights, a spoonful of jalapeños turns a basic bowl of chili or instant ramen into something craveable. Making tacos? These are your new go-to topping. I even use them to brighten up creamy dishes like my neiman marcus chicken casserole—the acidity cuts through the richness beautifully.
Crowd-Pleasers That Add Color and Heat
Pickled jalapeños aren’t just for quick meals—they’re also an easy win for entertaining. Add them to a cheese board or mix into your favorite dip for a spicy twist. Set them out in a ramekin next to sliders, mini tacos. Their vibrant green color and briny kick make any spread look and taste more exciting.
One of my favorite tricks? Blend a few slices into sour cream or Greek yogurt with a pinch of salt. It makes a zesty dip perfect for veggies, chips, or air fryer sweet potato bites. Once you start canning jalapeños like this, you’ll find yourself adding them to nearly every plate you serve.
Recipe Variations
Switch Up the Flavor
One of the best parts about canning jalapeños with this method is how flexible it is. Once you’ve tried the basic version, it’s easy to tweak the flavor to match your preferences. Want a little sweetness with your heat? Stir in an extra teaspoon of sugar. Looking for a smoky edge? Add a pinch of smoked paprika or a thin slice of chipotle pepper. For garlic lovers, try slicing the cloves instead of leaving them whole—but be warned, it intensifies over time.
You can also change up the vinegar. Swapping white vinegar for apple cider vinegar gives the brine a slightly fruitier tang. Just be sure to use vinegar with 5% acidity so the jalapeños stay safely preserved.
Mix It Up With Other Peppers and Extras
The same quick-pickling method for canning jalapeños works beautifully with other peppers, too. Try banana peppers, serranos, or even bell peppers if you’re after a milder version. I like combining jalapeños with red Fresnos for a bright, colorful mix that’s both beautiful and balanced in heat.
If you’re in the mood to experiment, toss in a few slices of onion or carrot for extra texture. Want to deepen the flavor? A bay leaf or a couple of black peppercorns can add complexity without overpowering the jalapeños. Just remember—less is more, and you don’t want to crowd the jar.
That’s what makes canning jalapeños so beginner-friendly. Like my express teriyaki chicken, it’s a recipe base that invites creativity. Start simple, then build your own signature flavor over time.
How to Store Pickled Jalapeños
Keep Them Crisp With the Right Storage
After canning jalapeños with this quick-pickling method, it’s time to store them properly so they stay fresh and crunchy. Once your peppers have soaked in the brine and cooled down, transfer them into a clean glass jar or an airtight plastic container. I love reusing jars from other recipes—it’s a budget-friendly and eco-conscious habit that fits right into my easy kitchen style.
Place the sealed jar in the fridge and let it sit for at least 24 hours before diving in. That short wait lets the brine fully infuse the jalapeños with tangy heat and helps the flavor deepen. Stored this way, your pickled jalapeños will last up to two months—though in my house, they’re usually gone in half that time.
Tips to Keep Your Canned Jalapeños Fresh Longer
Always use a clean spoon or fork when serving your pickled peppers to avoid introducing bacteria into the jar. Keep the brine free of food debris and tightly seal the lid after every use. If you ever notice the brine turning cloudy, a change in color, or an odd smell, it’s best to toss the batch and make a new one.
Since this method of canning jalapeños doesn’t use a water bath or pressure canning, refrigeration is key. You’re trading shelf stability for speed and simplicity, which works great for everyday use. Think of it like a kitchen shortcut that still delivers on flavor—just like my air fryer cottage cheese chips: quick, crunchy, and totally addictive.
FREQUENTLY ASKED QUESTIONS
Can jalapeños be canned without pickling?
Yes, you can can jalapeños without pickling them, but it requires a pressure canner to do it safely. Because jalapeños are low-acid vegetables, water bath canning without vinegar isn’t safe according to USDA guidelines. If you want to preserve the peppers without adding tang, pressure canning is the way to go. However, if you’re looking for speed and ease, this quick-pickling method lets you enjoy bold, spicy flavor with a simple stovetop brine—no special equipment required.
What is the best way to preserve fresh jalapeños?
That depends on how you plan to use them. For long-term storage, pressure canning or freezing are great options. If you want a faster, flavor-packed option, pickling is your best bet. Canning jalapeños in vinegar helps them last in the fridge for up to two months, and it adds a zesty kick that works on everything from nachos to sandwiches. I love this method because it’s beginner-friendly and you don’t need to sterilize jars or seal lids.
Is it better to freeze or can jalapeños?
Freezing is faster and works well if you plan to cook with the jalapeños later, but it can change the texture. Canning jalapeños—especially using a quick-pickling method—preserves their crunch and flavor better, especially if you like them as toppings or snacks. I always keep a jar in the fridge because they’re ready to go and hold up beautifully in salads, bowls, and wraps.
How to keep jalapeños crisp when canning?
The key to keeping jalapeños crisp is not overcooking them. In this recipe, the sliced peppers are added to the boiling brine after the heat is turned off. That way, they soften just enough without losing their bite. Also, letting them soak in hot liquid (rather than boiling them directly) helps lock in texture. Store them in the fridge and enjoy them within two months for the best crunch.
Conclusion
If you’ve ever looked at a big batch of fresh jalapeños and wondered what to do with them, this easy method for canning jalapeños is the answer. It’s quick, low-effort, and doesn’t require any special tools—just a few everyday ingredients and under an hour in the kitchen. The result? A jar full of spicy, zesty slices that bring bold flavor to anything from chili to grilled cheese.
What I love most is how effortlessly this fits into real life. There’s something deeply satisfying about making your own fridge staples, especially when they’re this simple. No waste, no stress—just another smart way to make the most of what you’ve got.
Whether you’re brand-new to canning jalapeños or just looking for a shortcut that actually works, this recipe is a keeper. Next time peppers are on sale or your garden’s bursting, you’ll know exactly how to turn them into something crave-worthy.
Love Easy, Flavor-Packed Recipes
If you’re enjoying this recipe and want more quick, delicious meals like it, follow us on Facebook and Pinterest for new posts, cooking tips, and behind-the-scenes peeks from my Brooklyn kitchen. We share weekly ideas to make your time in the kitchen easier—and more fun.