
No Bake Pumpkin Pie was the first dessert I ever made completely on my own. I was eleven, it was the day before Thanksgiving, and the oven was already spoken for—stuffed turkey, green bean casserole, and Mom’s famous sweet potatoes were all fighting for rack space. So, armed with a whisk, a tub of Cool Whip, and a store-bought graham cracker crust, I set out to create something sweet without a single minute of baking. The result? A creamy pumpkin pie that’s still a favorite in my Brooklyn kitchen today—simple, cozy, and surprisingly elegant.
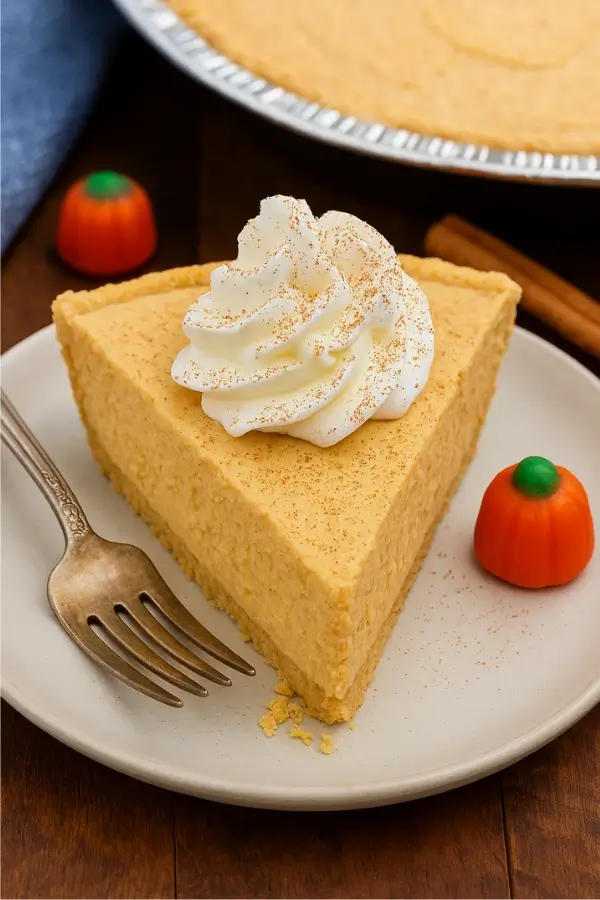
Table of Contents
Why I Love This No Bake Pumpkin Pie
No Bake Pumpkin Pie has become my fall signature—and not just because it’s ridiculously easy. It reminds me of cozy afternoons in my childhood kitchen, when the scent of cinnamon and nutmeg meant something delicious was coming. Back then, baking meant timers and oven mitts. These days, I lean into no bake recipes that let flavor shine without fuss.
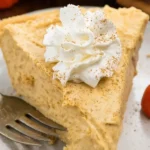
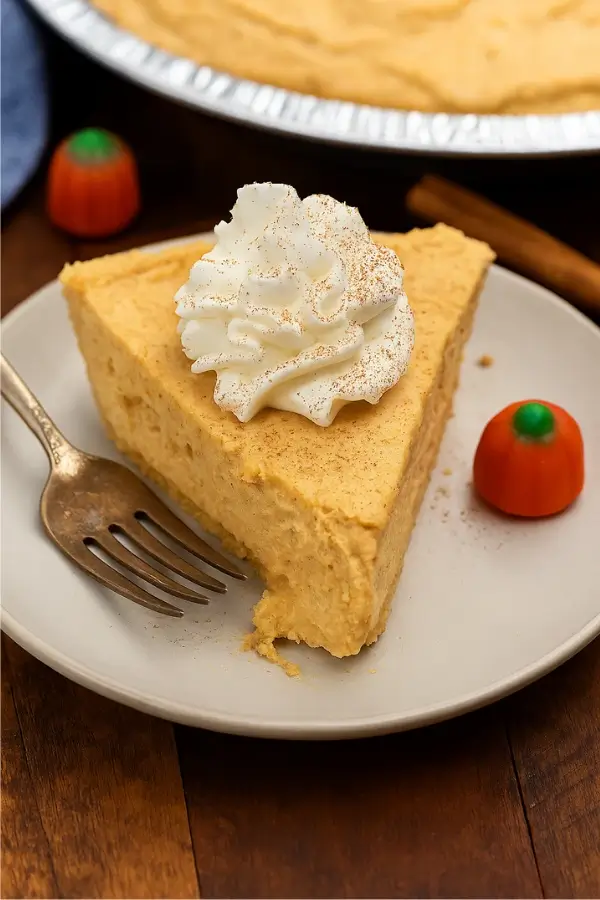
This pie is silky-smooth, gently spiced, and nestled in a buttery graham cracker crust. The filling is like a cross between pumpkin fluff dip and a mousse—thanks to instant pudding, pumpkin puree, and a generous fold of Cool Whip. It comes together in under 10 minutes, then chills quietly in the fridge until you’re ready to slice.
It’s my go-to when oven space is tight or I’m hosting last-minute. And every time I serve it, someone asks for the recipe before dessert’s even over. Honestly, it’s that good.
If you’ve already fallen for my Pumpkin Banana Loaf, this creamy pumpkin pie is your next must-try. It’s pure autumn comfort in a crust—easy, impressive, and always a hit.
No Bake Pumpkin Pie – Creamy, Easy, and No Oven Needed
- Total Time: 10 minutes
- Yield: 8 servings 1x
Description
This No Bake Pumpkin Pie is creamy, dreamy, and ready in minutes. Made with pumpkin puree, pudding mix, and a buttery graham cracker crust—no oven required!
Ingredients
- 1 cup pumpkin puree
- 1 3.4 oz box instant vanilla pudding
- 1/4 cup milk
- 2 teaspoons pumpkin pie spice
- 8 oz Cool Whip (or 2 cups whipped cream)
- 1 (9-inch) graham cracker crust
- Whipped cream for serving
Instructions
- In a large bowl, mix pumpkin puree, pudding mix, milk, and pumpkin pie spice until smooth.
- Gently fold in Cool Whip until well combined.
- Spread the mixture evenly into the graham cracker crust.
- Cover and chill for at least 3 hours, or overnight.
- Top with whipped cream before serving.
Notes
You can use homemade whipped cream instead of Cool Whip for a richer texture.
Store leftovers in the fridge up to 4 days or freeze for up to 1 month.
Use canned pumpkin puree—not pie filling.
- Prep Time: 10 minutes
- Cook Time: 0 minutes
- Category: Dessert
- Method: No Bake
- Cuisine: American
Nutrition
- Serving Size: 1 slice
- Calories: 224
- Sugar: 22g
- Sodium: 224mg
- Fat: 7g
- Saturated Fat: 2g
- Carbohydrates: 38g
- Fiber: 1g
- Protein: 2g
- Cholesterol: 5mg
No Bake Pumpkin Pie Ingredients & Graham Cracker Crust
This No Bake Pumpkin Pie comes together with just seven simple ingredients—most of which you probably already have on hand. The result? A creamy pumpkin pie that tastes like it took way more effort than it did.
What You’ll Need:
- Pumpkin Puree – Use plain canned pumpkin, not pumpkin pie filling. You want pure pumpkin flavor without added sugar or spices.
- Instant Vanilla Pudding Mix – This adds structure and sweetness without needing to cook the filling. Be sure to use instant, not cook-and-serve.
- Milk – Just a splash (1/4 cup) helps blend the pudding and pumpkin together.
- Pumpkin Pie Spice – You can use store-bought or your own blend of cinnamon, nutmeg, ginger, and cloves.
- Cool Whip (or Whipped Cream) – Cool Whip gives the pie its airy, mousse-like texture. You can also fold in homemade whipped cream for a richer feel.
- Graham Cracker Crust – Store-bought makes this recipe a breeze, but homemade adds a personal touch.
- Extra Whipped Cream – For topping, of course.
Want to try making your own crust? It’s easier than you think. Just crush graham crackers, mix with a little melted butter and sugar, and press into a pie pan. Chill it or bake briefly for a sturdier base. This version holds up beautifully with creamy fillings like this.
If you’re feeling adventurous, try swapping graham crackers for crushed gingersnaps or even Oreos for a fun twist. And if you like layered textures, pair it with one of my favorites: Carrot Cake Bars—spiced, moist, and perfect on a dessert tray with pie slices.
Step-by-Step: How to Make No Bake Pumpkin Pie Filling
Making the filling for this No Bake Pumpkin Pie is as easy as it gets—no stove, no oven, no stress. You only need one bowl and a few minutes to whip everything into creamy, dreamy shape.
Step 1: Mix the Base
In a large mixing bowl, whisk together one can of pumpkin puree, one box of instant vanilla pudding mix, 1/4 cup of milk, and 2 teaspoons of pumpkin pie spice. Stir until the mixture is smooth and lump-free. This forms the spiced backbone of your filling.
Step 2: Fold in the Whipped Topping
Next, gently fold in 8 ounces of Cool Whip (or about 2 cups of homemade whipped cream). Use a spatula and take your time—this is what gives your no bake pumpkin pie its mousse-like texture. Over-mixing will deflate it, so go slow and fold carefully until the mixture is light and evenly combined.
Step 3: Fill the Crust
Scoop the filling into your graham cracker crust and spread it evenly with a spatula. Smooth the top—it doesn’t have to be perfect. After all, you’re going to top it with fluffy whipped cream later.
This pie sets up beautifully in the fridge and slices clean once chilled. It’s the kind of dessert that makes you feel like a rockstar with almost no effort.
Want to round out dessert hour? Serve this pie alongside a chilled glass of my Cottage Cheese Smoothie—surprisingly creamy and protein-packed, it balances all that sweetness.
Serving Tips, Chill Time & Creative Variations for No Bake Pumpkin Pie
One of the best things about No Bake Pumpkin Pie? After just a few minutes of mixing, you’re done. From here, the fridge takes over—and you get to relax while dessert comes together on its own.
How to Chill for Best Results
Once your filling is nestled into the crust, loosely cover the pie and place it in the refrigerator. Let it chill for a minimum of 3 hours. I usually prep it the night before, which gives the pie enough time to set fully. When chilled overnight, each slice holds beautifully and the flavors meld even more.
How to Slice and Serve
For clean slices, use a sharp knife dipped in warm water and wiped between cuts. Top each piece with whipped cream or Cool Whip, then dust with cinnamon or a few extra graham cracker crumbles. Presentation doesn’t have to be fancy—just a little detail can make it feel special.
Easy Ways to Switch Things Up
Here’s where you can have fun and personalize this pie:
- Crust Upgrade: Try crushed gingersnaps or vanilla wafers instead of graham crackers. Each option brings a different kind of sweetness and crunch.
- Flavor Swap: Use cheesecake or butterscotch instant pudding instead of vanilla for a fun change in flavor.
- Add Some Tang: Blend in a few ounces of softened cream cheese for extra richness.
- Top It Off: Caramel sauce, chopped nuts, or toasted coconut make great finishing touches.
- Bump Up the Spice: Feel free to add a pinch more cinnamon or nutmeg if you like your pie extra cozy.
Want a fun contrast to this chilled pie? My Pineapple Upside Down Cake is warm, fruity, and balances the richness of pumpkin beautifully on any dessert table.
Keeping No Bake Pumpkin Pie Fresh
After you’ve enjoyed a few slices of this delicious No Bake Pumpkin Pie, you’ll want to keep the rest tasting just as good for later. Thankfully, storing it is just as easy as making it.
Chill It Right
Once the pie has set and been served, cover the dish loosely with plastic wrap or foil and place it back in the fridge. I recommend keeping it on a flat shelf so the filling stays level. It’ll stay fresh for 3 to 4 days, and the texture actually gets better by day two. If the pie’s already been cut, lay a bit of wax paper against the open sections to help prevent crust from getting soggy.
Want to Freeze It?
You absolutely can. Just wrap the pie snugly in two layers—first plastic wrap, then foil—and place it flat in your freezer. Whether you’re freezing the whole pie or individual slices, it’ll hold up for about a month. When you’re ready to eat, let it thaw overnight in the fridge. Add whipped cream or toppings after thawing for the best texture.
Small Batch Tip
Storing just a slice or two? Use a tight-lid container to protect the shape and keep the crust crisp. It’s a great excuse to enjoy a midday treat.
If you’re craving a light bite to balance out the sweetness, try it with a small bowl of my Korean Rice Cake—a fun, chewy contrast to the creamy pie.
Frequently Asked Questions
How do you make No Bake Pumpkin Pie?
It’s incredibly simple. You’ll mix canned pumpkin with instant vanilla pudding, a little milk, pumpkin pie spice, and Cool Whip. Once it’s smooth and fluffy, spread it into a graham cracker crust and chill for a few hours. That’s it—no oven, no stress, just pure pumpkin goodness.
What ingredients do I need for No Bake Pumpkin Pie?
All you need is pumpkin puree, instant vanilla pudding, milk, pumpkin pie spice, and Cool Whip. Pair those with a pre-made or homemade graham cracker crust, and finish it off with whipped cream on top. It’s quick, simple, and perfect for busy holiday prep.
Can I use homemade whipped cream instead of Cool Whip?
Yes, absolutely. Whip up some heavy cream with a little sugar until you get stiff peaks, and fold it into the pumpkin mixture just like you would with Cool Whip. Homemade whipped cream gives the pie a slightly richer texture and flavor while keeping it airy.
How long should a No Bake Pumpkin Pie chill before serving?
At least 3 hours in the refrigerator is best, though overnight is even better. Chilling gives the filling time to firm up, making it easier to slice cleanly and allowing the flavors to develop fully.
Can I make the crust myself?
Definitely. Just crush some graham crackers, mix with melted butter and a little sugar, and press into a pie dish. Chill for at least 30 minutes or bake it briefly if you want it a little firmer. Homemade crust adds a special touch and just takes a few extra minutes.
Can I use canned pumpkin pie filling instead of pumpkin puree?
Not for this recipe. Pumpkin pie filling already has sugar and spices added, which can throw off the balance. Stick with plain canned pumpkin puree so you can control the flavor and sweetness of your No Bake Pumpkin Pie.
Conclusion
If you’ve been looking for a dessert that’s simple, foolproof, and always a hit, No Bake Pumpkin Pie is it. It brings together everything we love about fall—the cozy spices, the creamy texture, the ease of assembly—all in one chilled slice of heaven. Whether you’re preparing it for a holiday gathering or just because pumpkin sounds good today, this pie fits the bill.
I hope this recipe becomes a go-to favorite in your kitchen the way it has in mine. And if you loved this, don’t miss other no-fuss recipes like my Sweet Potato Brownies or Cottage Cheese Smoothie. Thanks for stopping by—and happy no-baking!
Love Easy, Flavor-Packed Recipes
If you’re enjoying this recipe and want more quick, delicious meals like it, follow us on Facebook and Pinterest for new posts, cooking tips, and behind-the-scenes peeks from my Brooklyn kitchen. We share weekly ideas to make your time in the kitchen easier—and more fun.